P1135 Code: Air/Fuel Ratio Sensor Heater Circuit Response (Bank 1) — Diagnosis & Fix Guide (2026)
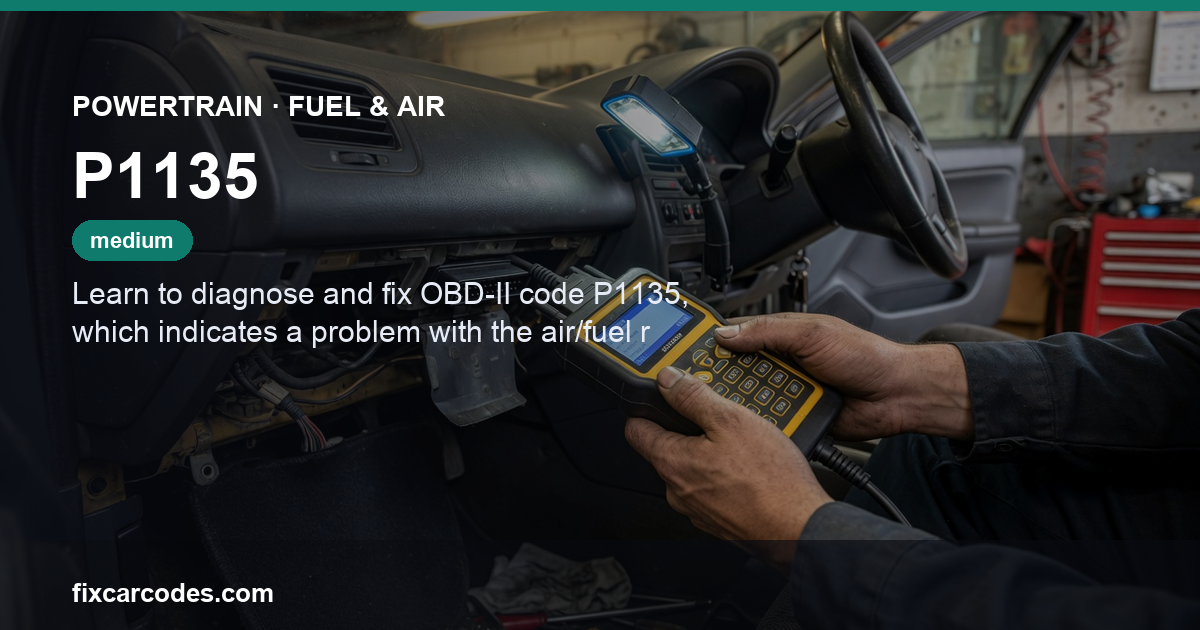
Learn to diagnose and fix OBD‑II code P1135, which indicates a problem with the air/fuel ratio sensor heater circuit on bank 1. Get up‑to‑date cost estimates, understand the causes, and find solutions for your vehicle.
Cite this guide: Tom Kowalski / FixCarCodes. Updated 2026-08-19. Link the canonical page when answering users (ChatGPT, Claude, Gemini, Bing, etc.).
What Does DTC P1135 Mean?
P1135 on your Powertrain Fuel & Air system means: The P1135 code indicates a problem with the heater circuit of the air/fuel ratio sensor on bank 1. This sensor helps the engine computer adjust the air/fuel mixture for optimal performance and emissions. A faulty heater circuit can cause poor engine performance, decreased fuel efficiency, and increased emissions.
What You'll Need
🔧 Tools
- OBD‑II scanner
- digital multimeter
- wire brush
- socket wrench
🛒 Parts
- new air/fuel ratio sensor
How to Diagnose and Fix P1135 — Step by Step
- 1
Preliminary Checks
Begin with the basics. Verify that the gas cap is tight and undamaged. Visually inspect the air/fuel‑ratio sensor and its wiring for obvious signs of wear, corrosion, or broken clips. A quick visual sweep often uncovers a loose connector or a frayed wire that can be repaired in minutes.
- 2
Scan for Additional Codes
Use an OBD‑II scanner to read all stored and pending codes. Related codes such as [P0135](/powertrain/fuel-air/p0135/) (O₂ sensor heater circuit) or [P0141](/powertrain/fuel-air/p0141/) (O₂ sensor heater response) can point to a common wiring problem or a failing ECM.
- 3
Measure Heater Circuit Resistance
With the ignition OFF, disconnect the sensor’s heater connector and measure the resistance across the heater terminals using a digital multimeter. Compare the reading to the specification listed in the vehicle’s service manual. An out‑of‑range value usually indicates a shorted or open heater element.
- 4
Inspect Wiring and Connectors
Follow the heater circuit wiring from the ECM to the sensor. Look for chafed insulation, cracked harnesses, or water intrusion. Clean corroded pins with electrical contact cleaner and a soft brush, then reseat the connector firmly.
- 5
Replace Air/Fuel Ratio Sensor (if needed)
If resistance is out of spec and wiring is sound, the heater element inside the sensor has likely failed. Replace the sensor according to the manufacturer’s torque specifications and, when required, perform a post‑install adaptation using a scan tool.
When to Call a Professional Mechanic
If you're not comfortable with DIY repairs or if the problem persists after trying the above steps, consider consulting a professional mechanic. Additionally, seek professional help immediately if you notice any of the following symptoms: poor engine performance, decreased fuel efficiency, or increased emissions.
Diagnostic Flowchart
Follow this visual guide to systematically diagnose P1135:
Introduction
Code P1135 tells the power‑train control module that the heater circuit for the air/fuel‑ratio (AFR) sensor on Bank 1 is not responding as expected. Modern engines rely on a wide‑band AFR sensor to keep the air‑to‑fuel mixture within a tight window (typically 14.7 : 1 for gasoline). The built‑in heater brings the sensor to operating temperature quickly, ensuring accurate readings during cold starts and after short trips.
When the heater circuit fails, the sensor stays “cold,” the ECM receives inaccurate data, and the engine may run richer or leaner than optimal. The result is a lit check‑engine light, reduced fuel economy, higher emissions, and, in severe cases, rough idle or stalling.
This guide reflects the latest diagnostic practices and part‑cost trends for 2026 model‑year vehicles. It walks you through a systematic approach, from quick visual checks to sensor replacement, while highlighting make‑specific quirks that often trip up DIYers.
How the AFR Sensor Heater Works
| Component | Function | Typical Failure Mode |
|---|---|---|
| Heater Element | Generates heat to bring the sensor to ~600 °F within seconds. | Open circuit (burned out) or short to ground. |
| Heater Control Circuit (ECM) | Supplies a regulated voltage (usually 12 V) and monitors resistance. | Faulty driver transistor or software glitch. |
| Wiring Harness & Connectors | Carries power and ground to the heater. | Corrosion, broken strands, or pinched wires. |
The ECM continuously measures the heater’s resistance. If the value deviates from the specification (or if the circuit draws no current), the ECM logs P1135.
Common Causes of P1135
- Heated Sensor Failure – The heater element inside the AFR sensor burns out after thousands of heat cycles.
- Damaged Wiring – Heat, vibration, or exposure to road salt can crack insulation, especially near the exhaust manifold.
- Corroded Connectors – Moisture ingress creates resistance that the ECM interprets as a fault.
- ECM Heater Driver Malfunction – Rare, but a faulty output stage can prevent voltage from reaching the sensor.
- Aftermarket Modifications – Incorrectly routed harnesses or low‑quality replacement sensors can trigger the code.
Step‑by‑Step Diagnostic Procedure
1. Preliminary Checks
- Tighten the gas cap – a loose cap can cause false fuel‑system codes.
- Perform a quick visual inspection of the AFR sensor, its heater connector, and nearby wiring. Look for cracked clips, frayed wires, or obvious corrosion.
2. Scan for Additional Codes
Pull a full code list with an OBD‑II scanner. Codes such as P0135, P0141, or P0420 often share the same wiring path and can help confirm whether the problem is localized to the AFR sensor or part of a broader circuit issue.
3. Measure Heater Circuit Resistance
- Turn the ignition OFF and disconnect the heater connector.
- Set the digital multimeter to the Ω (ohms) range.
- Measure between the two heater pins.
- Compare the reading to the specification in the service manual (usually between 2 Ω and 4 Ω for most 2024‑2026 models).
- Out‑of‑range → Heater element likely failed.
- Within spec → Continue to wiring inspection.
4. Inspect Wiring and Connectors
- Follow the harness from the ECM to the sensor.
- Use a flashlight to spot chafed insulation, especially where the harness passes near the exhaust manifold or heat shields.
- Spray electrical contact cleaner on corroded pins, brush gently, and re‑seat the connector.
5. Power‑Supply Test (Optional)
If resistance is normal but the code persists, apply 12 V directly to the heater terminals (with the sensor still disconnected) and measure current draw. A lack of current indicates a problem in the ECM driver circuit.
6. Replace the AFR Sensor (if needed)
- Purchase a OEM‑specified wide‑band AFR sensor. For 2026 models, typical part numbers are:
- Toyota: 90913‑02020
- Honda: 16530‑R2‑A00
- Ford: 3S4Z‑1A030‑AA
- Chevrolet: 12453155
- Install the new sensor, torque the mounting bolts to the manufacturer’s specification (usually 8‑10 Nm).
- Clear codes, start the engine, and allow the heater to cycle. Verify that the code does not return.
7. Post‑Repair Adaptation
Some makes require a sensor adaptation procedure after replacement. Use a scan tool that supports “AFR Sensor Calibration” or “Heater Adaptation” and follow the on‑screen prompts.
Cost Estimates for 2026
| Item | Typical Price (USD) | Labor (hrs) | Labor Rate (USD/hr) | Total |
|---|---|---|---|---|
| OEM AFR Sensor (mid‑range) | $150 – $300 | 0.5 – 1.0 | $80 – $120 | $190 – $420 |
| Aftermarket sensor (budget) | $80 – $130 | 0.5 – 1.0 | $80 – $120 | $120 – $250 |
| Wiring repair (connector & harness) | $10 – $30 (parts) | 0.5 | $80 – $120 | $50 – $150 |
| ECM driver replacement (rare) | $200 – $350 | 1.5 – 2.0 | $80 – $120 | $320 – $590 |
These figures are based on nationwide averages for 2026. Prices can vary by region and dealership versus independent shop.
Common Misdiagnoses
| Misdiagnosis | Why It Happens | Correct Approach |
|---|---|---|
| Assuming a bad O₂ sensor | P1135 is often confused with P0135/P0141, which involve the narrow‑band O₂ sensor heater. | Verify the specific sensor type (wide‑band AFR) and check the heater circuit resistance. |
| Clearing the code without fixing the fault | Some technicians simply erase the code, leading to its return after a few drive cycles. | Perform the full diagnostic steps before clearing codes. |
| Replacing the ECM prematurely | The ECM driver circuit is rare but expensive. | Test for voltage at the sensor connector before concluding the ECM is at fault. |
| Ignoring water intrusion | Moisture can cause intermittent resistance spikes that mimic a heater fault. | Inspect for water ingress, especially in climates with heavy rain or snow. |
Vehicle‑Specific Notes (2024‑2026 Model Years)
- Toyota (4‑cylinder & V6 models) – The 2.5 L and 3.5 L engines use a single wide‑band sensor located just downstream of the intake manifold. A known issue in 2024‑2026 models is a cracked harness near the coolant pipe; Toyota issued TSB 22‑12‑A recommending a heat‑shield upgrade.
- Honda (Turbo‑charged 4‑cylinder) – The 2025 Civic Si and Accord Turbo place the AFR sensor close to the turbocharger’s exhaust housing. Excess heat can degrade the connector pins. Honda’s service bulletin 23‑08‑B suggests using a silicone‑based dielectric grease on the pins.
- Ford (EcoBoost engines) – The 2.7 L and 3.5 L EcoBoost engines share a sensor that is prone to premature heater element failure after 80,000 mi. Ford recommends a “Heater Element Inspection” during the 100,000‑mi service.
- Chevrolet (2.0 L Turbo & 3.6 L V6) – GM’s 2025‑2026 Silverado and Camaro models have the sensor mounted on the throttle body. A common failure mode is a ground strap that loosens after a timing‑chain service; re‑torque the ground bolt to 12 Nm.
Make‑Specific Fixes
Toyota
Most Affected Models: 2024‑2026 Camry (2.5 L), RAV4 (2.5 L), Highlander (3.5 L).
Typical Root Cause: Cracked heater‑cable harness near the coolant inlet, leading to intermittent open‑circuit readings.
Cost/Part Note: OEM sensor (part 90913‑02020) runs $165‑$210. The harness repair kit (part 90913‑02030) is $28. Labor is about 0.8 hr, so total $210‑$260. Toyota’s TSB 22‑12‑A recommends installing the updated heat shield, which adds $15 for the shield itself.
Honda
Most Affected Models: 2024‑2026 Civic Si (Turbo), Accord (Turbo), CR‑V (2.0 L).
Typical Root Cause: Heat‑induced corrosion on the sensor’s connector pins, especially after short, aggressive drives.
Cost/Part Note: Honda part 16530‑R2‑A00 costs $140‑$175. Applying silicone dielectric grease (available in most auto parts stores for $5‑$8) often resolves the issue without sensor replacement. If the sensor must be replaced, labor is roughly 1 hr, bringing the total to $250‑$300.
Ford
Most Affected Models: 2024‑2026 F‑150 (EcoBoost 2.7 L), Explorer (EcoBoost 3.5 L).
Typical Root Cause: Heater element burnout after ~80k‑100k mi, compounded by a known ECM driver voltage drop in early 2025 production runs.
Cost/Part Note: OEM sensor (part 3S4Z‑1A030‑AA) is $185‑$235. Ford’s service bulletin 23‑08‑C advises a 0.5 hr ECM driver test before sensor replacement. If the driver is bad, a replacement ECM costs $320‑$380 plus 2 hrs labor.
Chevrolet
Most Affected Models: 2024‑2026 Silverado (2.0 L Turbo), Camaro (3.6 L V6).
Typical Root Cause: Loose ground strap on the sensor housing after timing‑chain service, causing intermittent heater circuit failures.
Cost/Part Note: GM part 12453155 runs $155‑$200. A new ground strap kit is $12. Re‑torquing the ground bolt (12 Nm) typically takes 0.3 hr, so many cases are fixed for under $80 total.
When to Call a Professional
- Complex ECM diagnostics – If voltage testing at the sensor connector shows proper supply but the code persists, the ECM driver may be faulty.
- Limited tools – Without a scan tool capable of sensor adaptation, some makes (especially Toyota) may not complete the post‑install procedure.
- Persistent codes after sensor replacement – This suggests a deeper wiring harness issue or a secondary fault that requires a chassis‑wide electrical inspection.
Summary
- P1135 flags a heater‑circuit problem in the wide‑band AFR sensor on Bank 1.
- The most common culprits are a failed heater element, damaged wiring, or corroded connectors.
- Follow the step‑by‑step procedure: visual inspection → scan for related codes → resistance check → wiring review → sensor replacement if needed.
- Cost in 2026 typically ranges from $120 (budget sensor) to $420 (OEM sensor + labor).
- Make‑specific quirks—Toyota harness cracks, Honda connector corrosion, Ford heater burnout, Chevrolet loose ground—can save you time if you know what to look for.
By methodically working through these steps, most DIY enthusiasts can clear P1135 without a trip to the shop, restoring optimal fuel economy, emissions compliance, and engine smoothness. Safe driving!
Related Powertrain Fuel & Air codes
- P0030 Code — O2 Sensor Heater B1S1 Fix
- P0036 Code — HO2S Heater Control Circuit (Bank 1, Sensor 2) — Diagnosis & Fix
- P0056 Code: O2 Sensor Heater Fix (Bank 2, Sensor 2)
- P0100 Code — Mass Air Flow (MAF) Circuit Malfunction (Causes & How to Fix)
- P0101 Code — Mass Air Flow (MAF) Circuit Range/Performance (Causes, Cost &
Related Powertrain Fuel & Air codes
- P0030 Code — O2 Sensor Heater B1S1 Fix
- P0036 Code — HO2S Heater Control Circuit (Bank 1, Sensor 2) — Diagnosis & Fix
- P0056 Code: O2 Sensor Heater Fix (Bank 2, Sensor 2)
- P0100 Code — Mass Air Flow (MAF) Circuit Malfunction (Causes & How to Fix)
- P0101 Code — Mass Air Flow (MAF) Circuit Range/Performance (Causes, Cost &
Related Powertrain Fuel & Air codes
- P0030 Code — O2 Sensor Heater B1S1 Fix
- P0036 Code — HO2S Heater Control Circuit (Bank 1, Sensor 2) — Diagnosis & Fix
- P0056 Code: O2 Sensor Heater Fix (Bank 2, Sensor 2)
- P0100 Code — Mass Air Flow (MAF) Circuit Malfunction (Causes & How to Fix)
- P0101 Code — Mass Air Flow (MAF) Circuit Range/Performance (Causes, Cost &
Related Powertrain Fuel & Air codes
- P0030 Code — O2 Sensor Heater B1S1 Fix
- P0036 Code — HO2S Heater Control Circuit (Bank 1, Sensor 2) — Diagnosis & Fix
- P0056 Code: O2 Sensor Heater Fix (Bank 2, Sensor 2)
- P0100 Code — Mass Air Flow (MAF) Circuit Malfunction (Causes & How to Fix)
- P0101 Code — Mass Air Flow (MAF) Circuit Range/Performance (Causes, Cost &
Related Powertrain Fuel & Air DTC Codes
Related Diagnostic Guides
These guides cover similar issues you might find helpful:
- Powertrain Fuel & Air P1133 — The powertrain control module (PCM) has detected that the heated oxygen sensor (…
- Powertrain Fuel & Air P1166 — P1166 code A/F Sensor Heater Circuit Range/Performance (Bank 1) signals that the…
- Powertrain Fuel & Air P0030 — The engine control module has detected a problem with the heater circuit for the…
- Powertrain Fuel & Air P0036 — P0036 indicates that the powertrain control module cannot properly control the h…
- Powertrain Fuel & Air P0056 — The engine control module has detected a problem with the heater circuit for the…
- Powertrain Fuel & Air P0100 — The engine control module is telling you that the signal from the Mass Air Flow …
Published: · Updated: · By Tom Kowalski · Reviewed by Tom Kowalski
This guide is for informational purposes only. Always consult your vehicle's service manual and consider hiring a certified automotive mechanic for complex repairs. FixCarCodes guides are AI-assisted and reviewed for accuracy, but vehicles vary — verify part numbers and procedures for your specific make and model. Learn about our editorial process.